
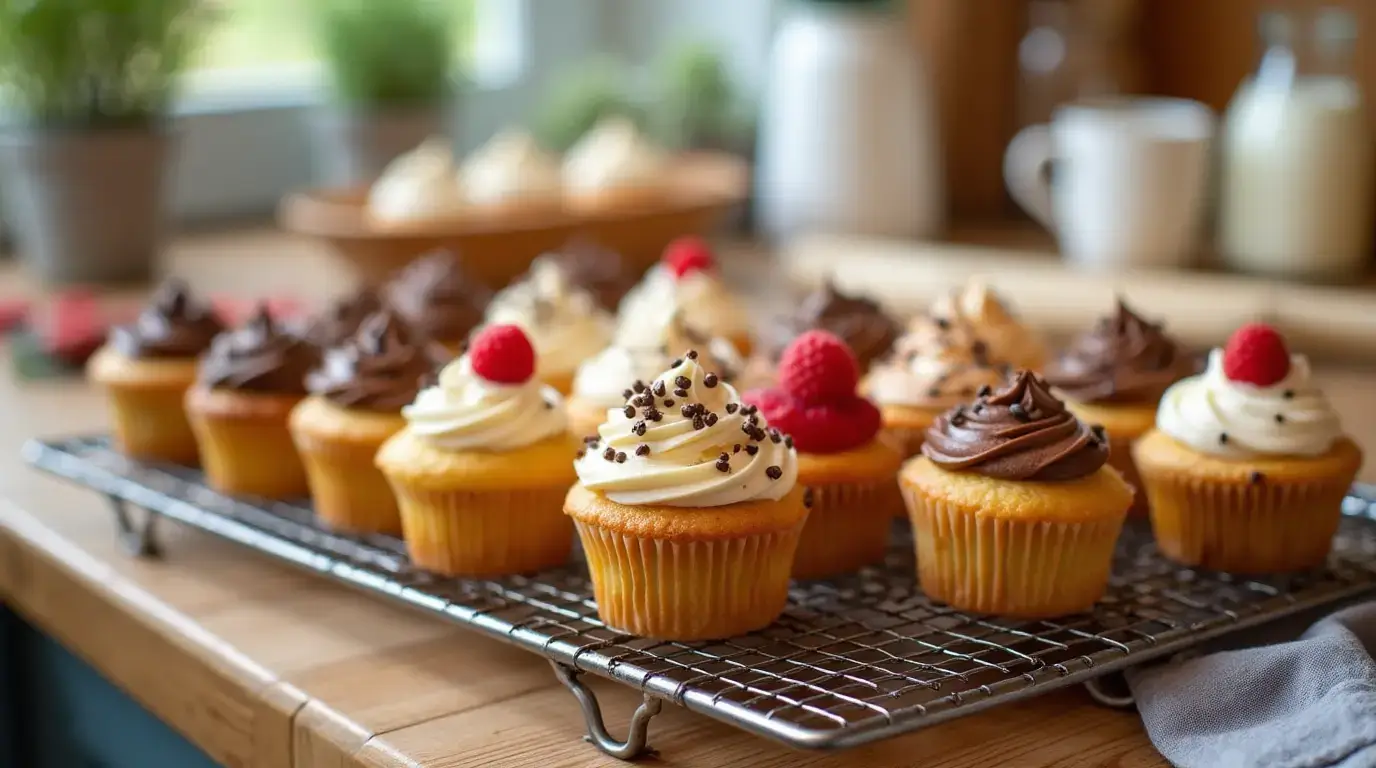
Mini cupcakes are the perfect party treat that deliver huge flavor in a bite-sized package. They’re delightfully easy to whip up with everyday ingredients. Best of all, you can have a fresh batch on the table in minutes for any celebration!
Ever find yourself juggling a craving for something sweet, but you’re worried about ending up with a dry or flavorless treat? Whether it’s an overly dense batter, a lack of fun toppings, or just the plain hassle of baking large batches, many people feel intimidated by cupcake recipes. Fortunately, there’s a super simple fix: these mini delights let you enjoy dessert without the fuss or leftover waste. You’ll love how quickly the batter comes together, and how effortless it is to decorate them.
In this article, we’ll walk you through each step—from choosing the right ingredients to mastering the perfect baking time—so you can make mini cupcakes your new go-to sweet treat. Get ready to explore easy tricks, fun variations, and time-saving tips that will make your kitchen adventures both stress-free and delicious!
Why You’ll Love Mini Cupcakes
Bite-sized desserts are beloved for many reasons, and these mini gems stand out among the crowd. Their perfectly petite shape satisfies your sweet tooth without leaving you feeling overindulgent. Plus, they’re an absolute hit at any gathering—whether it’s a child’s birthday party or a cozy weekend brunch.
But there’s more to these tiny wonders than just their cuteness factor:
- Easy Portion Control
Having trouble resisting a giant, frosting-laden cupcake? With small servings, you can enjoy just enough sweetness without that heavy, post-dessert slump. - Ideal for Variety
You can bake an assortment of flavors—like classic vanilla, mini chocolate cupcakes, or even fruit-infused variations—all at once. This is perfect for parties where different preferences abound. - Convenient Baking
Cupcakes mini in size typically have a shorter baking time than their larger counterparts, which translates to less time in the kitchen. If you’ve ever asked, “How long to bake mini cupcakes for best results?”—you’ll be thrilled to learn that they can be done within 10 to 15 minutes, depending on your oven. - Perfect for Decorating
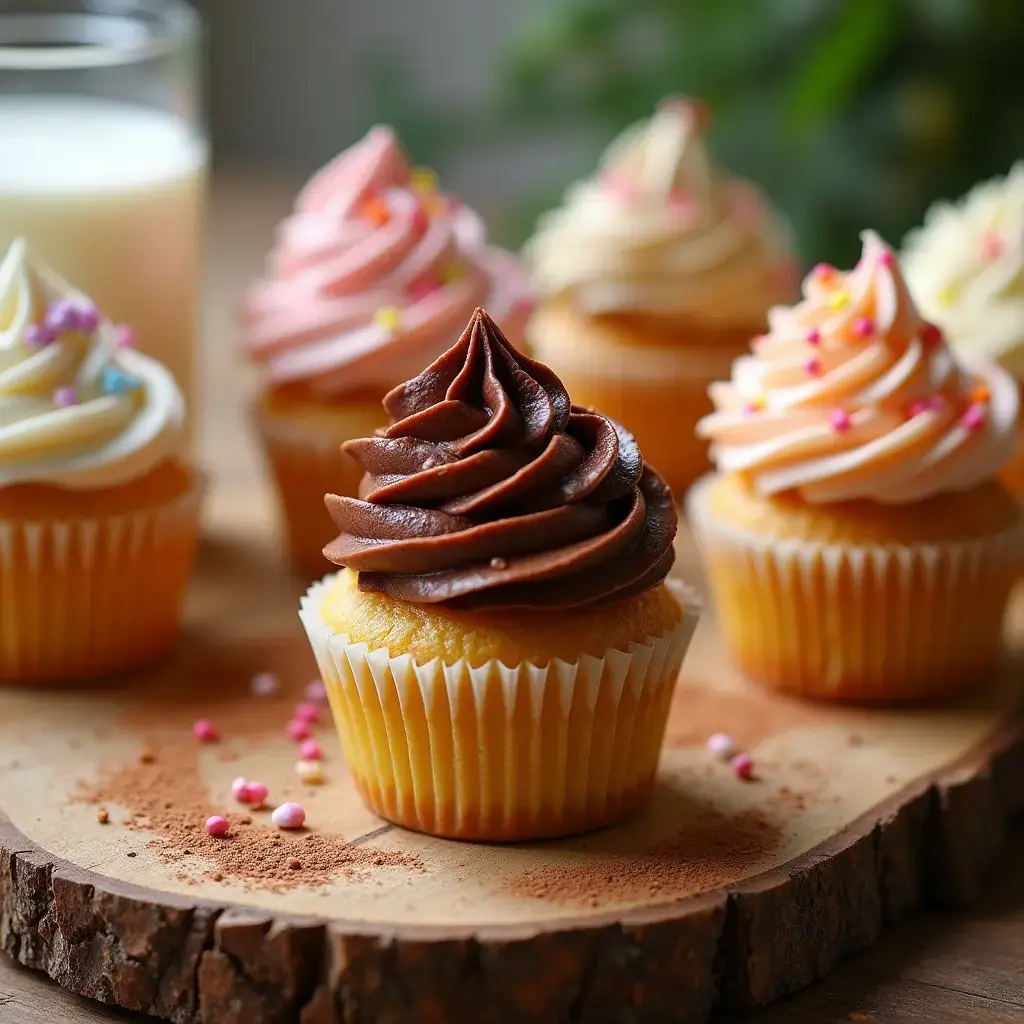
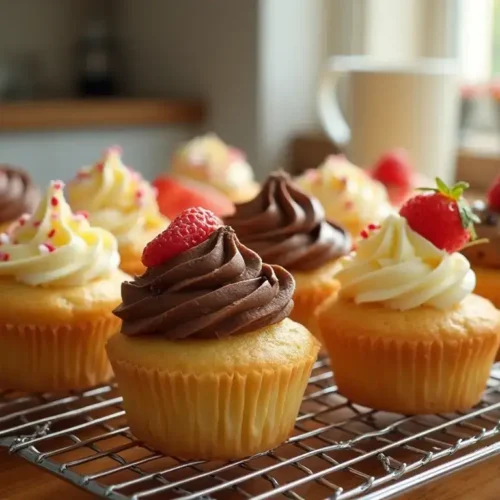
Decorating full-sized cupcakes can feel like an art project. But with smaller ones, a swirl of frosting and a sprinkle of toppings instantly look amazing. - Great for Gifting
Pop them into mini cupcake liners or mini cupcake paper liners, place them in a cute box, and you have an adorable edible gift. No fuss, and absolutely no specialized decorating skills required.
Before we move on to the ingredients that make these tiny treats special, here’s a quick tip: the next section will reveal exactly how these components come together and how you can adapt them for different tastes.
Ingredients for Mini Cupcakes
A fantastic batch of mini cupcakes starts with a handful of familiar pantry staples. Each ingredient works its own magic to create that perfect texture—light, fluffy, and sweetly irresistible. Here’s what you’ll need:
- All-Purpose Flour (1 ½ cups)
Provides structure. Sift it for a smoother batter and fewer lumps. - Granulated Sugar (¾ cup)
Sweetens the deal while helping achieve a tender crumb. - Baking Powder (1 ½ teaspoons)
Ensures a good rise so your mini cupcakes recipe never turns out flat. - Salt (¼ teaspoon)
Balances sweetness and intensifies flavors. - Eggs (2 large)
Binds the ingredients while adding moisture. Room-temperature eggs mix more evenly. - Milk (½ cup)
Adds extra moisture to keep each cupcake soft. Any type of milk works; choose dairy or a non-dairy alternative. - Unsalted Butter (½ cup, softened)
Delivers richness and a smooth texture. Some bakers prefer oil for a moister crumb, but butter lends a classic flavor. - Vanilla Extract (1 teaspoon)
Elevates the overall taste. Experiment with almond extract or citrus zest if you like unique twists.
Optional Add-Ins
- Chocolate Chips or Chunks (½ cup) for bursts of sweetness.
- Fruit Puree for a natural fruity flavor (strawberry or banana).
- Spices (cinnamon, nutmeg) for a cozy touch.
Pro Tip: For flavor variations, consider adding matcha powder for a subtle earthy taste, or a drop of peppermint extract for festive flair. Adjust the sugar level if you incorporate sweet add-ins, and feel free to play around with toppings that match your personal preferences.
If these ingredients already have your mouth watering, just wait until you see how effortlessly they come together in the next section.
How to Make Mini Cupcakes
Crafting a perfect batch of these bite-sized sweets is simpler than you might think. Once your ingredients are prepped, you can expect a mini cupcake cook time of about 10 to 15 minutes—no more standing around waiting for large pans to finish baking!
Follow these straightforward steps for a foolproof outcome:
- Preheat Your Oven
Set your oven to 350°F (175°C). This ensures even baking and a consistent mini cupcake pan temperature. - Line the Tin
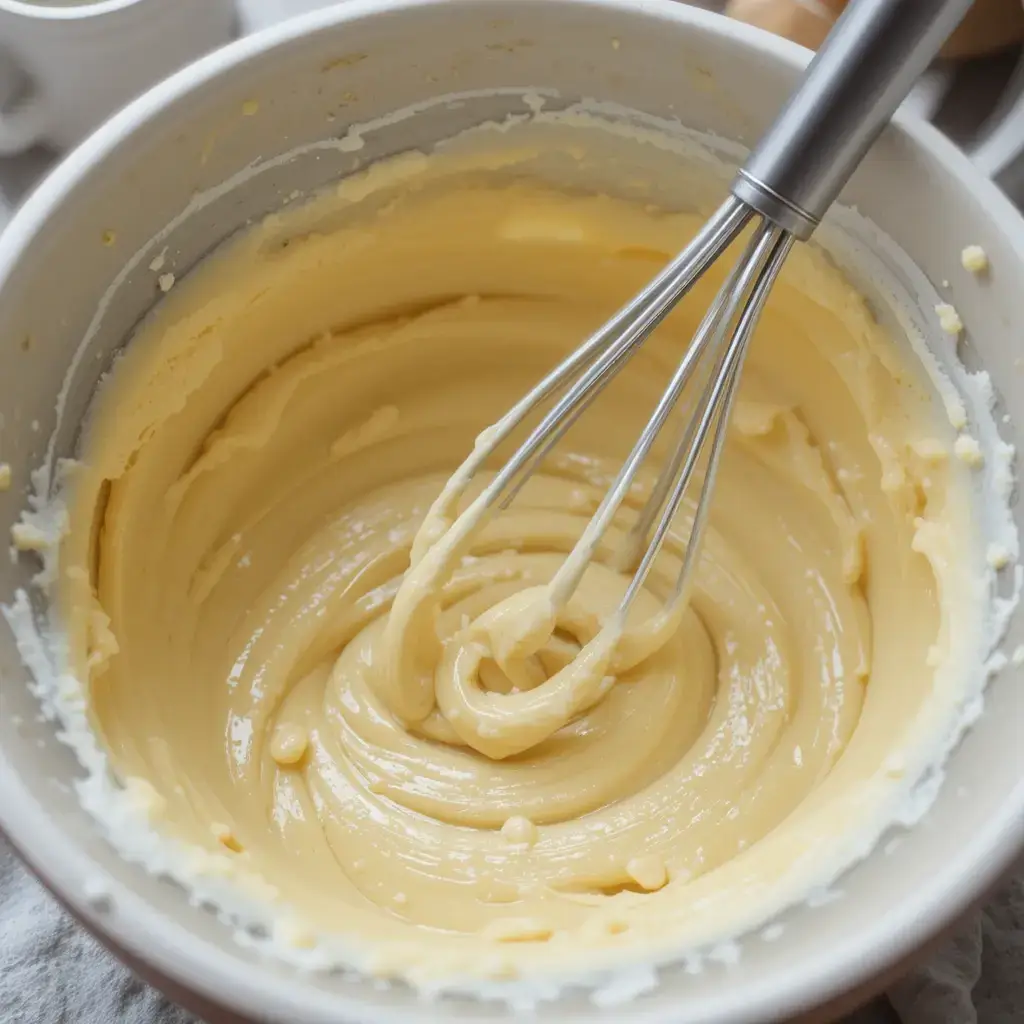
Place mini cupcake liners in each slot of your baking tray. If you happen to run out of liners, lightly grease the pan to prevent sticking. - Cream the Butter and Sugar
- In a mixing bowl, combine softened butter and sugar.
- Beat on medium speed until the mixture becomes fluffy and pale in color.
- This step helps trap air, which contributes to a light, airy cupcake crumb.
- Incorporate Eggs and Flavor
- Crack the eggs into the bowl one at a time, blending well after each addition.
- Stir in your vanilla extract or any other preferred flavor essence.
- Mix the Dry Ingredients
- In a separate bowl, whisk together flour, baking powder, and salt.
- Slowly add this mixture to the butter-sugar-egg mixture, alternating with milk.
- Blend until just combined to avoid overmixing.
- Fill the Liners
- Spoon batter into each liner, filling them about ¾ of the way. If you’re wondering, “How much batter do you put in a mini cupcake liner?” this is just enough space for the cupcakes to rise without overflowing.
- If desired, sprinkle in some chocolate chips or fruit bits at this stage.
- Bake to Perfection
- Slide your tray into the oven.
- If you’ve ever asked yourself, “How long mini cupcakes bake before they’re done?”—start checking at the 10-minute mark.
- They’re ready when a toothpick inserted into the center comes out clean or with a few crumbs.
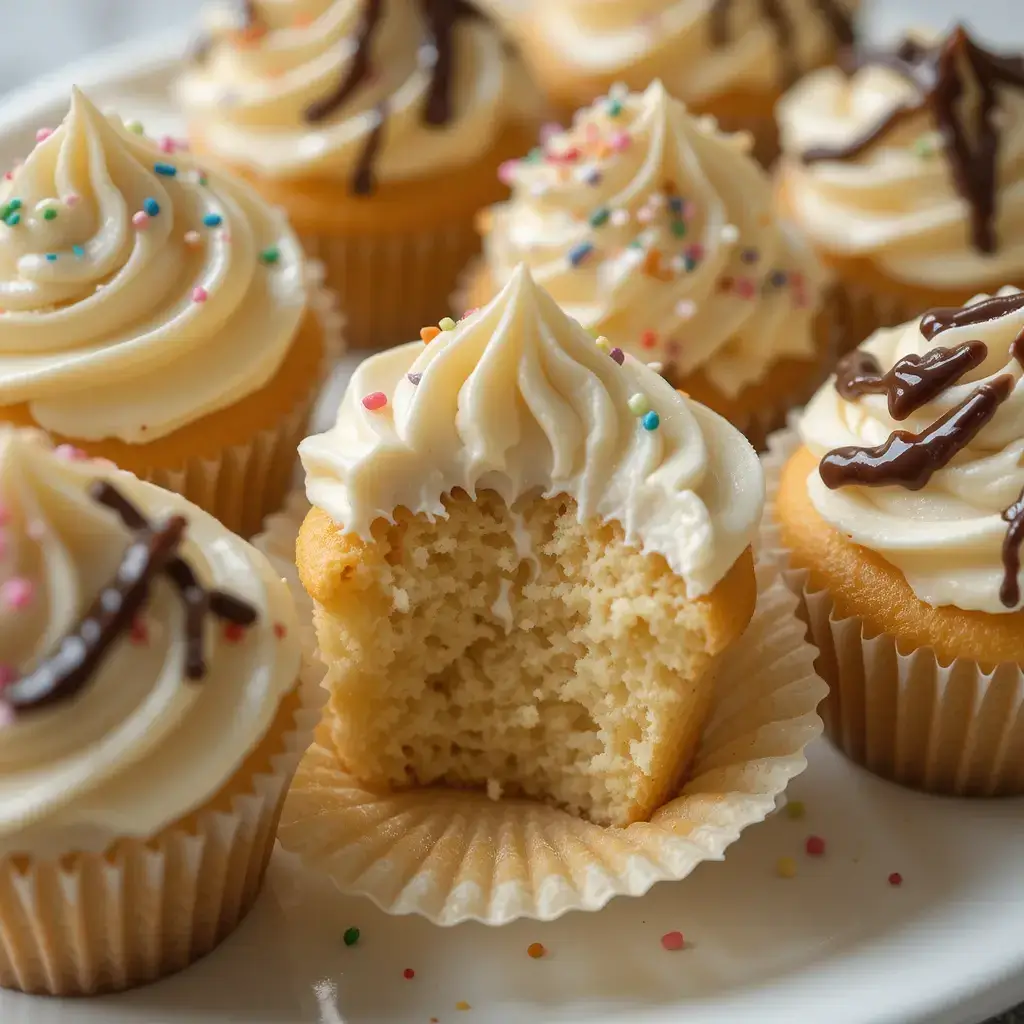
- Cool and Decorate
- Let the cupcakes cool in the tin for a couple of minutes before transferring them to a wire rack.
- Once cool, frost them with your favorite buttercream, drizzle them with chocolate sauce, or keep them naked if you prefer a simpler treat.
With the cupcakes baked and ready, it’s time to explore some chef-approved tricks for perfect results every single time—plus a few fun variations!
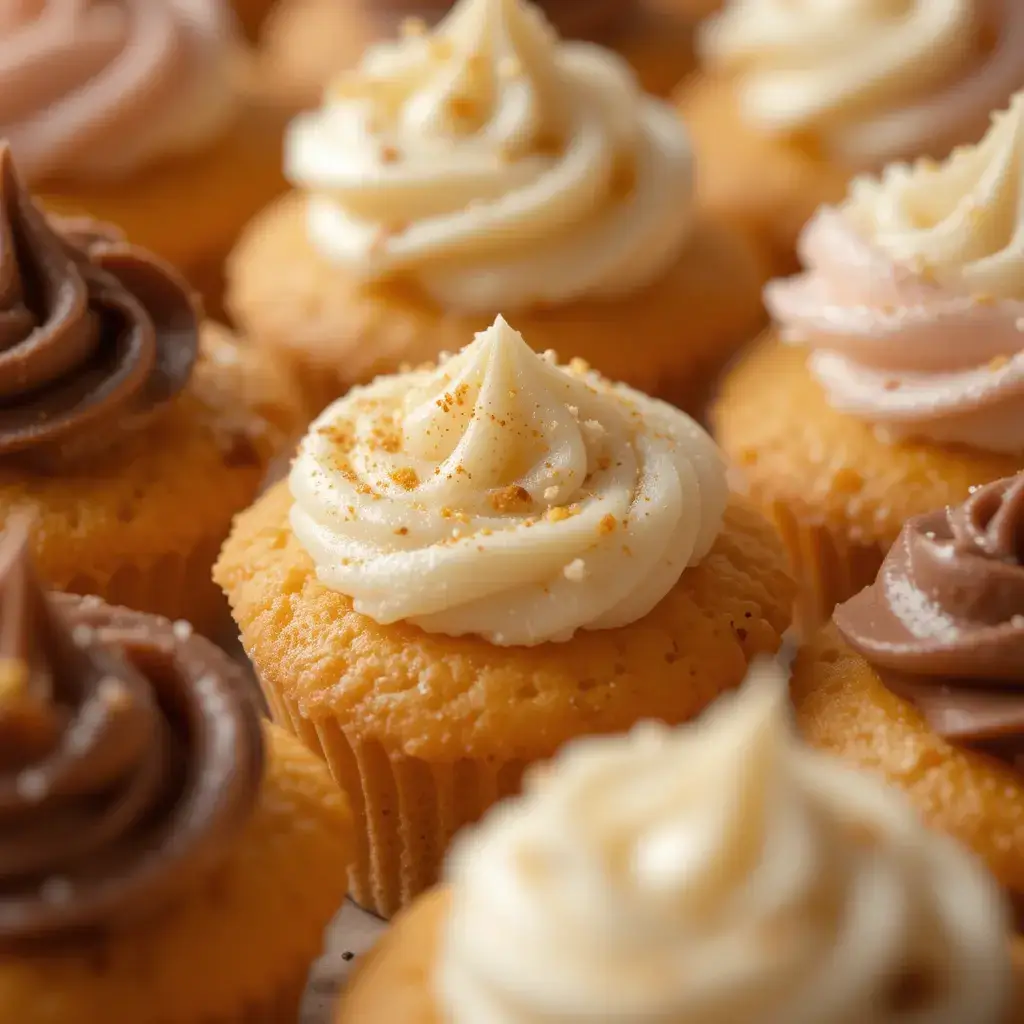
Chef Tips and Variations for Mini Cupcakes
Baking small, uniform treats can pose its own set of quirks. While the process is mostly straightforward, a few professional tips will help you elevate your mini cupcakes from good to unforgettable.
Pro Tips for Perfect Texture
- Use Room-Temperature Ingredients
Soft butter and eggs at room temperature ensure a more consistent batter. Cold ingredients can lead to clumping and uneven mixing. - Measure Accurately
Baking is a science, so precise measurements matter. Use a kitchen scale for the flour if you want to be extra careful. - Don’t Overfill
Resist the urge to load your mini cupcake liner to the brim. Too much batter can lead to spillage and irregular shapes. - Check Early
Because these cupcakes are small, they can overbake quickly. Keep a close eye on them toward the end of the mini cupcake cook time. - Cool Completely Before Frosting
Warm cupcakes will melt your frosting, leading to a messy finish. Patience is key!
Flavor Variations
- Fruity Swirl: Mix in pureed strawberries or blueberries for bursts of color and natural sweetness.
- Double Chocolate: Fold cocoa powder into the flour mix for mini chocolate cupcakes, then sprinkle chocolate chips on top.
- Zesty Citrus: Add lemon or orange zest to the batter for a refreshing, tangy twist.
- Spiced Comfort: Infuse the batter with cinnamon, nutmeg, or pumpkin spice for an autumnal treat.
Decorative Ideas
- Buttercream Swirls: Use a star piping tip for a bakery-style finish.
- Ganache Drizzle: Heat heavy cream and chocolate to create a glossy drizzle.
- Candy Crunch: Top with crushed candy bars or chopped nuts for extra texture.
- Fresh Fruit: A small strawberry slice or blueberry on top makes a bright and healthy garnish.
Now that you know how to perfect both the taste and look of these sweet bites, let’s see how best to serve them—and how to store any extras you might have (though it’s unlikely they’ll last long!).
Serving Suggestions for Mini Cupcakes
One of the greatest joys of mini cupcakes near me (or near you, anywhere you might be!) is their versatility. They fit in seamlessly at almost any event or meal. Here are some fun ways to serve them:
- Birthday Party Favor: Arrange them on a tiered cupcake stand for a showstopping dessert table centerpiece.
- Afternoon Tea: Place them on delicate saucers alongside a pot of tea or coffee.
- Dessert Sampler: Offer them alongside other bite-sized treats like cookies, brownies, or fruit tarts for a buffet.
- Brunch Spread: Pair them with savory mini quiches to balance out sweet and salty flavors.
- Celebration Packs: Box them up in a cute container as edible gifts for friends, family, or co-workers.
If you’re planning to serve them later or simply can’t resist whipping up extra batches, the next section will cover how to store these treats properly and keep them fresh for whenever your sweet tooth strikes.
Storing and Reheating Leftovers for Mini Cupcakes
While it’s hard to imagine a scenario where these bite-sized sweets don’t vanish immediately, it’s good to know the best way to keep them fresh if you do end up with leftovers. Proper storage ensures they remain moist and just as tasty the next day.
- Room-Temperature Storage
- Place cupcakes in an airtight container.
- Keep them in a cool, dry place for up to two days.
- If frosted with a buttercream topping, be sure to shield them from direct sunlight or heat.
- Refrigeration
- If your cupcakes include perishable fillings or frostings (like cream cheese), transfer them to the refrigerator.
- Store them in a sealed container to prevent absorbing any fridge odors.
- Allow them to reach room temperature before serving again for the best flavor.
- Freezing
- Wondering “Can I freeze mini cupcakes?” Absolutely! Freeze them unfrosted for up to three months.
- Thaw in the refrigerator or on the counter, then ice them right before you plan to serve.
- Reheating
- While most people enjoy these cupcakes at room temperature, you can microwave them for 5–10 seconds to revive a just-baked feel.
- Avoid overheating, as that can dry them out.
With your leftovers cared for, let’s recap the most important points in the next section, where we’ll also touch on common pitfalls and how to dodge them.
More Delicious Desserts to Try
If you loved these mini cupcakes, here are more delightful treats to satisfy your sweet tooth:
- Cotton Candy Cake – A fun, fluffy cake bursting with nostalgic cotton candy flavor.
- Cotton Candy Ice Cream – A dreamy, creamy frozen treat perfect for any occasion.
- Matcha Cake Recipe (Vegan) – A plant-based twist on matcha cake with earthy, sweet flavors.
- Matcha Tiramisu – A fusion of classic Italian tiramisu with the bold taste of matcha.
- Matcha Cheesecake – A rich and creamy dessert that matcha lovers will adore.
- Jamaican Desserts – Explore the vibrant, tropical world of authentic Jamaican sweets.
Mini Cupcakes Obsession
Equipment
- Mixing bowls
- Hand mixer or stand mixer
- Measuring cups and spoons (or kitchen scale)
- Mini cupcake pan
- Mini cupcake liners (optional but recommended)
- Wire cooling rack
Ingredients
- 1 ½ cups all-purpose flour
- ¾ cup granulated sugar
- 1 ½ teaspoons baking powder
- ¼ teaspoon salt
- 2 large eggs room temperature
- ½ cup milk
- ½ cup unsalted butter softened
- 1 teaspoon vanilla extract
(Optional) ½ cup chocolate chips, fruit pieces, or nuts for variation
Instructions
- Preheat oven to 350°F (175°C).
- Line your mini cupcake pan with liners or lightly grease each cup.
- Cream butter and sugar together until light and fluffy.
- Add eggs one at a time, mixing well; then stir in vanilla extract.
- Combine flour, baking powder, and salt in a separate bowl; add to wet mixture, alternating with milk until just mixed.
- Fill each liner about ¾ full.
- Bake for 10–15 minutes or until a toothpick inserted comes out clean.
- Cool in the pan briefly, then transfer to a wire rack to cool completely before frosting or serving.
Notes
Key Takeaways
- Easy Crowd-Pleaser: Their small size and quick bake time make mini cupcakes ideal for gatherings.
- Flexible Flavors: From chocolate to fruit to spice, the batter is a great canvas for experimentation.
- Mindful Baking: Avoid overfilling liners and keep a close eye on bake times to prevent dryness.
- Simple Storage: Use airtight containers and consider freezing them unfrosted for longer shelf life.
Coming up next, we’ll answer some frequently asked questions to help you master these petite treats like a pro.
FAQs
What is the difference between mini cupcakes and normal cupcakes?
The main difference is size, which impacts mini cupcake cook time—they bake faster due to their smaller volume. Otherwise, the ingredients are usually the same. Mini versions are great for portion control and variety in flavors.
How long do mini cupcakes last?
Generally, they stay fresh for about two days at room temperature. If you’ve frosted them with a perishable topping, store them in the fridge, where they can last up to four days.
Do mini cupcakes need liners?
While not strictly necessary, using mini cupcake liners helps prevent sticking and makes cleanup simpler. It also adds a decorative touch—perfect if you’re gifting them!
How do you adjust baking time for mini cupcakes?
Because they’re smaller, how long to bake mini cupcakes is typically 10–15 minutes, instead of 18–20 for full-sized cupcakes. Start checking doneness at 10 minutes.
How do you keep mini cupcakes moist?
Properly measuring ingredients, not overbaking, and storing them in an airtight container all help maintain moisture. If you’re using frosting, that also helps seal in freshness.
How many mini cupcakes from a cake mix?
A standard boxed cake mix usually yields around 48 mini cupcakes, though the exact number can vary depending on how much you fill each liner.
Next, let’s tie everything together with a concise conclusion that underscores the essence of these adorable confections.
Conclusion
There’s just something irresistible about tiny, flavor-packed sweets that can make anyone’s day brighter. These mini cupcakes embody that magic, offering the freedom to experiment with flavors, decorate with creativity, and share a little piece of joy wherever you go. Whether you enjoy them plain or piled high with frosting, we hope they become a staple in your baking routine. Happy baking—and happy indulging!