
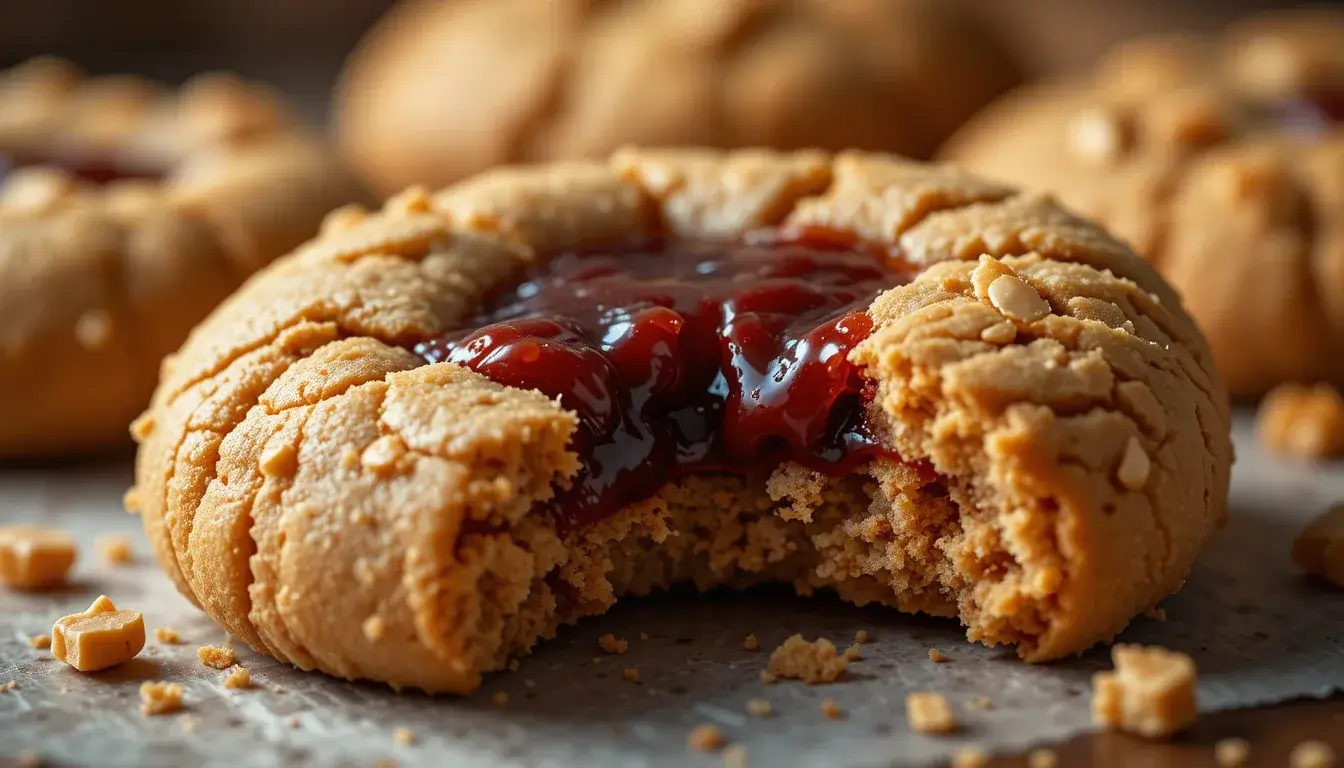
Peanut butter and jelly cookies bring together the nostalgic flavors of peanut butter and fruity jam into one chewy, delightful bite. They’re quick to whip up and only require a handful of staple pantry ingredients. Perfect for family gatherings or a personal indulgence, these treats combine the best of salty and sweet in record time!
Ever longed for a cookie that instantly transports you back to carefree childhood afternoons? So often, we settle for dry or lackluster treats that never quite recapture those happy memories. Fortunately, peanut butter and jelly cookies are your simple solution for achieving all the sweet-salty delight, minus the stress. You’ll only need a handful of everyday ingredients, and the steps are straightforward enough for busy weeknights or last-minute bake sales.
In this article, we’ll break down each step, share expert tips to ensure success, and offer ideas to make these treats truly your own.
Why You’ll Love Peanut Butter and Jelly Cookies

Sweet jam and nutty peanut butter have long been a classic pairing, evoking cozy memories and comforting flavors. These nostalgic treats are perfect for those moments when you want a burst of sweetness balanced with a satisfying, protein-rich element. They’re also a versatile crowd-pleaser: kids adore the fruity center, while adults appreciate the subtle salty undertone. According to the USDA, peanut butter is a good source of healthy fats and vitamins, making these baked bites feel a tad more substantial than your average cookie. From the delightful aroma that fills your kitchen to the swirl of jam in every bite, peanut butter and jelly cookies speak to both tradition and modern convenience.
If you’re searching for a treat that bridges generations, consider that peanut butter and jelly sandwiches have been a lunchbox staple since the early 1900s. Food historians note that this iconic combination rose in popularity because of its accessibility, affordability, and ease of preparation. By translating that same concept into a cookie, you retain all the nostalgia while adding a playful twist. It’s a surefire hit whether you’re celebrating a special occasion or simply indulging in a midnight snack. The contrasting flavors of salty peanuts and sweet jelly keep each bite interesting, making it hard to stop at just one.
Perhaps the best part is how flexible these cookies can be. You can swap out the jam flavor, adjust the level of sweetness, or even incorporate different nut butters for a fresh spin each time you bake. Don’t let the simplicity fool you—this dessert can feel downright gourmet with just a few creative tweaks. Up next, let’s explore the ingredient list in detail so you know exactly what goes into every scrumptious batch.
Ingredients for Peanut Butter and Jelly Cookies
To create this sweet-meets-savory cookie experience, you’ll need a few pantry basics plus your favorite fruit preserve. Here’s a rundown of what goes into the dough for peanut butter and jelly cookies:
- All-Purpose Flour (2 cups): Provides structure to hold up the nut butter and jam. If you prefer a denser chew, you can substitute half of it with whole wheat flour. This also adds a bit more fiber.
- Creamy Peanut Butter (1 cup): Delivers that signature nutty flavor and creamy texture. Make sure you choose a smooth variety for easier mixing. Avoid the natural types that tend to separate, as those can affect consistency. The USDA confirms that peanut butter offers a source of protein, Vitamin E, and essential minerals, so it’s not only tasty but also carries a bit of nutritional value.
- Granulated Sugar (¾ cup): Adds sweetness and helps achieve a slightly crispy edge. You can adjust the amount based on personal taste or swap with brown sugar for extra moisture.
- Brown Sugar (½ cup): Brings a gentle molasses flavor and keeps the cookies soft in the middle. Using both granulated and brown sugar creates the ideal balance between chewy and crisp.
- Unsalted Butter (½ cup, softened): Contributes richness and tenderness. If you only have salted butter, simply reduce the added salt in the recipe.
- Egg (1 large): Works as a binding agent and helps the dough hold its shape. You can use a flax egg as a plant-based alternative, which also boosts the fiber content.
- Salt (½ teaspoon): Highlights the sweet and nutty flavors. Adjust to your liking but don’t skip it entirely, as it helps bring out the best in every ingredient.
- Vanilla Extract (1 teaspoon): Enhances the overall flavor profile, giving the dough a warm, inviting aroma that pairs beautifully with fruit spreads.
- Fruit Jam (½ cup, any preferred flavor): The jammy counterpart to the peanut butter. Strawberry, grape, or raspberry are popular choices, but feel free to get creative with flavors like apricot or mixed berry for a unique twist in your peanut butter and jelly cookies.
Pro Tip: For a playful spin, fold in mini chocolate chips or swirl in a bit of cocoa powder to create a chocolate-peanut butter fusion. If you’re keen on more texture, toss in some chopped peanuts or toasted coconut. Ready to start baking? Let’s walk through the process step by step.
How to Make Peanut Butter and Jelly Cookies

Making peanut butter and jelly cookies is simpler than you might think. Follow this step-by-step approach for consistent, delicious results every time:
- Preheat the Oven: Warm your oven to 350°F (175°C). Prepare a baking sheet by lining it with parchment paper or a silicone mat to make cleanup effortless. Preheating ensures the cookies bake evenly right from the start.
- Cream the Butter and Sugars: In a large mixing bowl, use a hand mixer or stand mixer to cream together the softened butter, granulated sugar, and brown sugar until light and fluffy. This process helps incorporate air, giving your cookies a lighter texture. It can take about 2 to 3 minutes, so be patient.
- Incorporate Peanut Butter and Egg: Blend in the creamy peanut butter next, followed by the egg and vanilla extract. Mix just until everything is combined; overmixing can lead to denser cookies and less distinct jam wells.
- Add Dry Ingredients: In a separate bowl, whisk together the flour and salt. Slowly add this mixture to the wet ingredients, mixing on low speed until a soft dough forms. If the dough seems too sticky or warm, pop it in the fridge for 15 minutes to firm up. This chilling step can help the cookies maintain their shape.
- Shape and Press: Scoop out tablespoon-sized portions of dough and roll them into balls. Place them on your lined baking sheet, leaving about 2 inches of space between each. Use your thumb or the back of a teaspoon to make a small indent in the center of each dough ball, creating a well for the jam.
- Fill with Jam: Carefully spoon a small amount of your chosen fruit jam into each indentation. Aim to fill about three-quarters of the cavity to avoid spillage during baking. If you overfill, the jam may bubble over and burn on the cookie sheet.
- Bake to Perfection: Slide the tray into your preheated oven and bake for 10–12 minutes, or until the edges are lightly golden. The cookies may appear slightly soft in the center, but they’ll firm up as they cool. Allow them to sit on the baking sheet for a few minutes before moving them to a wire rack to cool down entirely.
By following these steps, you ensure every batch of peanut butter and jelly cookies turns out beautifully jammy and delightfully soft. Next, we’ll dive into some chef-inspired ideas and flavor twists to make your cookies shine even brighter.
Chef Tips and Variations for Peanut Butter and Jelly Cookies
Elevate your baking game with tried-and-true tips and a few imaginative twists on this beloved cookie concept. Whether you’re seeking maximum flavor or want to accommodate dietary preferences, a few small tweaks can have a big impact:
- Focus on Freshness: Always use fresh jam and a just-opened jar of creamy nut butter. The quality of these two main components can make or break the final taste.
- Use a Cookie Scoop: To ensure even baking, measure each portion of dough with a small cookie scoop. Consistent cookie sizes promote uniform browning and texture.
- Experiment with Fillings: Instead of grape or strawberry jam, try raspberry preserves for tanginess or a smooth apple butter if you love a fall-inspired treat. You can even create your own jam blends—think blueberry-peach or strawberry-rhubarb—to keep things interesting.
- Allergy Alert: As peanuts are one of the top eight allergens recognized by the FDA, be mindful if you’re sharing these with a crowd. For a nut-free alternative, consider using sunflower seed butter or tahini, though the flavor will shift slightly.
- Texture Toppings: Crushed peanuts, mini chocolate chips, or shredded coconut sprinkled over the jam before baking add texture and flair. For an even more decadent finish, drizzle melted chocolate over the cooled cookies.
- Bake Time Variations: If you like a softer cookie, shave off a minute or two from the bake time and watch closely. For a crispier edge, let them go the full 12 minutes or even a minute longer—just be sure they don’t brown too much.
- Gluten-Free Swap: Opt for a 1:1 gluten-free baking mix in place of all-purpose flour. Add an extra tablespoon of liquid if the dough feels too stiff.
- Beyond PB&J: Consider swirling in marshmallow fluff alongside the jam for a playful s’mores-inspired taste, or add a hint of cinnamon to the dough for a warm, spiced twist.
By tailoring these suggestions to your personal taste, you’ll never grow bored of this classic combination. Next, let’s explore how to serve them in style.
Serving Suggestions for Peanut Butter and Jelly Cookies

The real fun comes in deciding how you want to showcase these jam-filled delights. While they’re undeniably tasty straight out of the oven, here are a few ideas to help you take peanut butter and jelly cookies up a notch:
- Cookie Sandwiches: Spread a thin layer of peanut butter & jelly between two cookies to transform them into mini sandwiches. This concept mirrors peanut butter jelly sandwich cookies but with a crisp, sweet edge.
- Ice Cream Pairing: Serve warm cookies alongside a scoop of vanilla or strawberry ice cream. The contrast between hot and cold adds a decadent touch.
- Snack Platter Perfection: Create a playful dessert board with an assortment of peanut butter jelly cookies, fresh fruit, and a variety of dips like melted chocolate or whipped cream. It’s a sweet way to entertain guests without a lot of extra work.
- Lunchbox Surprise: For a fun twist on the traditional PB&J sandwich, pack a couple of these baked treats in your lunch. They satisfy sweet cravings without the need for extra sauces or spreads.
- Crumbled Topping: Break a few cookies into pieces and sprinkle them over yogurt or a fruit parfait. The combination of crunchy cookie bits, creamy yogurt, and fresh fruit can be a delightfully balanced snack or dessert.
Feel free to get creative with how you serve this iconic pairing. In the next section, we’ll cover the best practices for storing any leftovers so you can keep that fresh-from-the-oven taste.
Storing and Reheating Leftovers for Peanut Butter and Jelly Cookies
Once you’ve baked a batch of these delicious treats, you’ll want to preserve their texture and flavor as long as possible. Proper storage not only helps maintain freshness but also reduces the risk of the jam sticking or the cookie drying out. Here’s how to store peanut butter and jelly cookies effectively:
- Room Temperature: Place the cookies in a single layer within an airtight container, separating layers with parchment paper if necessary. They’ll stay soft and tasty for up to five days, provided your kitchen isn’t excessively warm or humid.
- Refrigeration: If you’re in a hot climate or simply want to keep them around longer, store them in the fridge for up to a week. The jam may firm up slightly, but a quick rest at room temperature will restore its softer consistency.
- Freezing: These cookies freeze well, making it easy to enjoy them at a moment’s notice. Arrange them on a tray in the freezer until fully hardened, then transfer to a zip-top bag or freezer-safe container. They can last for up to three months—just let them thaw overnight in the fridge or on the countertop.
- Reheating Option: While they’re typically eaten at room temperature, you can warm peanut butter and jelly cookies slightly in a low oven (about 300°F) for a few minutes to recapture their freshly baked aroma. Avoid microwaving, as it can make the jam overly hot and the cookie texture somewhat chewy.
With these easy tips, you can keep your treats tasting fresh for days or even months. Next, let’s wrap up the key points so you can put your new baking knowledge into action.
More Delicious Desserts to Try
If you loved these Peanut Butter and Jelly Cookies, here are some other irresistible treats you won’t want to miss:
- Jif Peanut Butter Cookie Recipe – A classic peanut butter cookie recipe using Jif for the perfect creamy texture.
- Tiramisu Cups – A delightful twist on traditional tiramisu, served in individual cups for a perfect portion.
- Pistachio Tiramisu – A nutty and creamy variation of the beloved Italian dessert.
- Tiramisu Brownies – A rich, chocolatey take on tiramisu combined with fudgy brownies.
- Limoncello Tiramisu – A refreshing citrus-infused tiramisu with the zesty kick of limoncello.
- Tiramisu Latte – Enjoy the flavors of tiramisu in a comforting and creamy coffee drink.
These treats will satisfy your sweet cravings and add more variety to your dessert repertoire. Happy baking!

Peanut Butter and Jelly Cookies
Equipment
- Mixing bowls
- Hand mixer or stand mixer
- Rubber spatula
- Baking sheet
- Parchment paper or silicone mat
- Cooling rack
Ingredients
- 2 cups all-purpose flour
- ½ cup unsalted butter softened
- 1 cup creamy peanut butter
- ¾ cup granulated sugar
- ½ cup brown sugar
- 1 large egg
- ½ teaspoon salt
- 1 teaspoon vanilla extract
- ½ cup fruit jam strawberry, grape, raspberry, etc.
(Optional) Crushed peanuts for topping
Instructions
- Preheat your oven to 350°F (175°C) and line a baking sheet with parchment paper.
- In a large bowl, cream the butter, granulated sugar, and brown sugar until fluffy, about 2–3 minutes.
- Mix in the peanut butter, egg, and vanilla extract just until combined.
- In a separate bowl, whisk the flour and salt. Slowly add to the wet mixture to form a soft dough.
- Roll tablespoon-sized balls of dough and place them on your prepared baking sheet.
- Use your thumb or a teaspoon to make an indentation in each ball, then fill with jam.
- Bake for 10–12 minutes, or until the edges are lightly golden.
- Allow the cookies to cool on the baking sheet for 2 minutes, then transfer to a rack to finish cooling.
Notes
Key Takeaways
Here’s a quick rundown of the essential tips for whipping up peanut butter and jelly cookies:
- Quality First: Using fresh ingredients, from jam to peanut butter, is crucial for the best flavor.
- Balance is Key: A small amount of salt can elevate the sweetness and nuttiness to a new level.
- Mind the Bake Time: Slightly underbaking yields a softer center, while a few extra minutes offer a crispier bite.
- Storage Savvy: Keep peanut butter and jelly cookies in an airtight container at room temperature or in the fridge, and freeze any extras for later.
- Room to Experiment: Whether it’s changing the jam flavor or adding toppings, there are endless ways to personalize your batch.
Armed with these points, you’re well on your way to mastering the perfect cookie. Now, let’s clear up a few lingering questions you might have.
FAQs about Peanut Butter and Jelly Cookies
Can I use chunky peanut butter instead of creamy?
Absolutely. Chunky peanut butter adds extra crunch and texture, giving your peanut butter and jelly cookies a bit more bite. Just be aware that it might slightly change the consistency, so keep an eye on the dough’s moisture level. If the dough feels too dry, add a splash of milk or a bit of extra butter.
What type of jam works best for this cookie recipe?
Any jam or fruit preserve can be used, though grape, strawberry, and raspberry remain favorites for that nostalgic PB&J taste. You can even try marmalade, peach compote, or a mixed berry blend to create a unique flavor profile in your peanut butter and jelly cookies.
Is there a way to make them vegan?
Yes! Swap out the egg for a flax egg (1 tablespoon of ground flaxseed mixed with 3 tablespoons of water) and use a plant-based butter substitute. Ensure your jam and other ingredients are also vegan-certified. The result is just as delicious, although you may need to adjust the baking time by a minute or two.
How do I know when they’re fully baked?
Look for lightly golden edges and a slightly soft center. The cookies will firm up as they cool on the baking sheet, so avoid over-baking to keep them tender. If you like a crispier cookie, extend the bake time by another minute or two, but watch closely to prevent burning.
Can I prepare the dough in advance?
Definitely. You can refrigerate the dough for up to 24 hours or freeze scooped dough balls for a couple of months. Thaw the dough slightly before baking and fill with jam as usual. This makes it easy to have freshly baked peanut butter and jelly cookies whenever you want.
Are these cookies suitable for those on a gluten-free diet?
Many store-bought gluten-free flour blends work perfectly in this recipe. Choose a reputable 1:1 mix that contains binding agents like xanthan gum, and you’ll hardly notice a difference in taste or texture. You may need to add a bit of liquid if the dough feels dry.
Conclusion
Peanut butter and jelly cookies are more than just a tasty treat—they’re a reminder of simpler times, family gatherings, and the undeniable charm of a classic flavor duo. By combining the creamy nuttiness of peanut butter with the sweet, fruity burst of jam, you can create a dessert that delights taste buds across all ages. We hope this comprehensive guide inspires you to roll up your sleeves and bake a batch of pure comfort. Share them with friends, pass them down through generations, or enjoy them as a sweet pick-me-up on a busy day. Happy baking!